Hi guys, it’s Day 4 of our 10 Days, 10 Posts event.
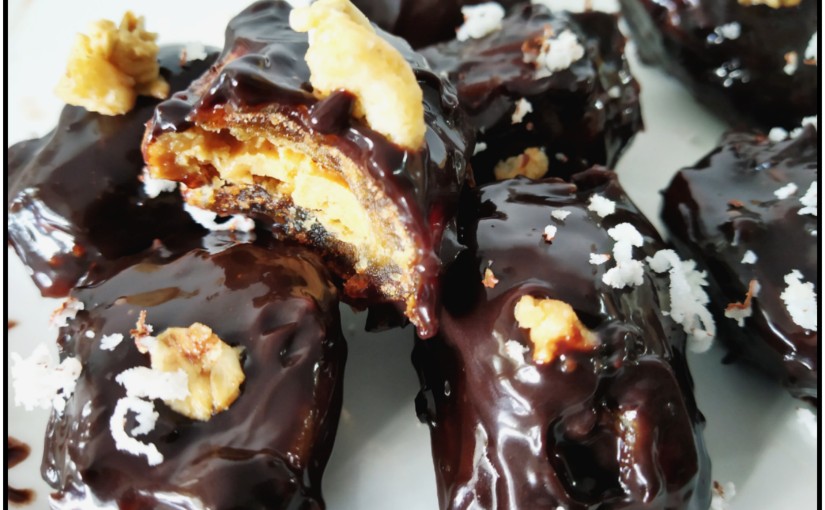
I am sharing another recipe with all of you- Chocolate Covered Dates, stuffed with Peanut Butter.
Trust me, it sounds fancy, tastes amazing and yet is extremely simple to make. Infact, it is so simple, that I debated whether to share this recipe on the blog or not, because it is hardly any work at all. I finally decided to share it because they tasted so delicious! My husband who is my biggest critic, was quite surprised when he ate these dates and said they taste like some exotic chocolate!
Also, it doesn’t require any great skill in cooking/baking and everybody can make it!
The best part about these is that the dates add natural sweetness and you don’t really need to add white sugar. The only sugar which will be present is from the chocolate you use. You can use a darker and semi-sweet chocolate. If you are vegan like me, you can use a vegan chocolate bar or vegan chocolate chips.
Thus, this is a very uncomplicated, nutritious, mouthwatering and easy to prepare snack/dessert, perfect for those post lunch afternoons or as a quick bite with your cup of tea/coffee. It caters to all your hunger pangs & cravings!
So let’s go ahead and have a look at the recipe!
Ingredients:
10-12 pitted dates
2-4 tsps peanut butter
Melted chocolate 1 cup
Cocoa powder 1/2 tsp (optional)
Coconut flakes for topping (optional)
Granola or chopped almonds for topping (optional)
Procedure:
Take the pitted dates & make sure their slit is open
With a spoon fill the dates with peanut butter. Make sure not to overfill, else, the chocolate will not stick to the dates.
Take chocolate-chips or any plain chocolate bar and melt the chocolate in a microwave bowl. You can use 1-2 chocolate bars depending on their size. I used 3-4 tbsps of chocolate chips. I didn’t really measure, I just melted enough chocolate chips to fill 1 cup / small bowl.
To enhance the chocolate flavour even more, you can add the cocoa powder, if you wish to. It’s a completely optional step.
Dip the dates in the melted chocolate. Make sure they are covered from all sides with chocolate.
Remove the chocolate covered dates immediately after dipping and coating & place them on another plate.
Sprinkle them with any toppings of your choice like chopped almonds/ granola/coconut flakes. I used dried coconut & grated it into flakes and topped them. I also added some bits of granola from my breakfast cereal.
Refrigerate for 1-2 hours and serve.
That’s it! You are done!
Variation: You can even replace the peanut butter and place cashews or almonds inside the dates and then cover it with chocolate.
Hi guys! I hope you all read my previous post regarding managing anxiety in current times of COVID_19.
Keeping in mind the situation that we all are facing, it is very essential for all of us to keep ourselves busy at home. Hence, I am coming up with interesting content for all of you.
From today, I am starting a 10 days 10 posts event on my blog where I will be posting a new article everyday on different topics.
In today’s post I share 2 recipes. Tomorrow’s post will be on a different topic. Since the main niches of this blog are Food & Recipes. Health & Wellness, Travel and Poetry & Musings, I shall be sharing on topics related to these niches.
Anyway, coming back to today’s topic- Food & Recipes; Now cooking can be quite therapeutic and can be fun, especially if one decides to try out new recipes and prepare a variety of dishes. At times, it can get tedious too and I feel bored to cook at times, nevertheless, I try to keep it fun so that I feel motivated to cook. Cooking it is an essential lifeskill, especially in current times where we are restricted to our homes. Also, nothing beats the satisfaction and comfort of a well-cooked meal.
In today’s blog post, I will be sharing 2 recipes.
Vegan Paneer Tikka Masala
Garlic Naan
If you want to know why I quit dairy in my diet- Read here.
These recipes that I have shared in this post are simple and easy to prepare and yet give you a restaurant style taste and that is why I am sharing them. It will require a just a tiny bit of preparation but it is quite hassle-free.
RECIPE FOR VEGAN PANEER TIKKA MASALA
This is not the elaborate North Indian recipe where one grills the tikkis first. It is a quicker version of the same recipe and results are almost similar and the taste is very restaurant like and extremely delicious!
Ingredients:
2 blocks Tofu. (diced) (Substitute with Paneer if not vegan)
1 packet Suhana Paneer Tikka Masala (Recommended. Read Procedure for recipe without this masala)
4 pods cardamom
2 tsps saunf (fennel seeds)
1 tsp mustard seeds
1 tsp jeera seeds (cumin seeds)
3 green chillies
1 tsp turmeric powder
1/2 tsp dhania powder (coriander powder)
1/2 tsp jeera powder
4 medium sized tomatoes (chopped)
1 big sized onion (finely chopped)
3 tbsp oil or more if needed. (I used olive oil, you can use any oil you wish to use)
Salt according to taste
Procedure:
In a heated pan, add 2 tbsps oil and add the diced tofu cubes. Pan fry them, add salt and pepper. Once they turn golden-brown and a little crisp, switch off gas and keep them aside. The tofu cubes should not be too golden brown or hard else they will not absorb the flavours. A medium golden-brown colour is sufficient.
In a wok or kadhai, heat oil. Once oil has heated enough, add the mustard seeds & chopped green chillies. As soon as the popping sounds reduce, add the jeera (cumin seeds). Add finely chopped onion and let it caramelize and change colour.
Once the onions turn soft & caramelize, add the turmeric powder, dhania & jeera powder and the cardamom seeds and sauf. Saute for a minute or so.
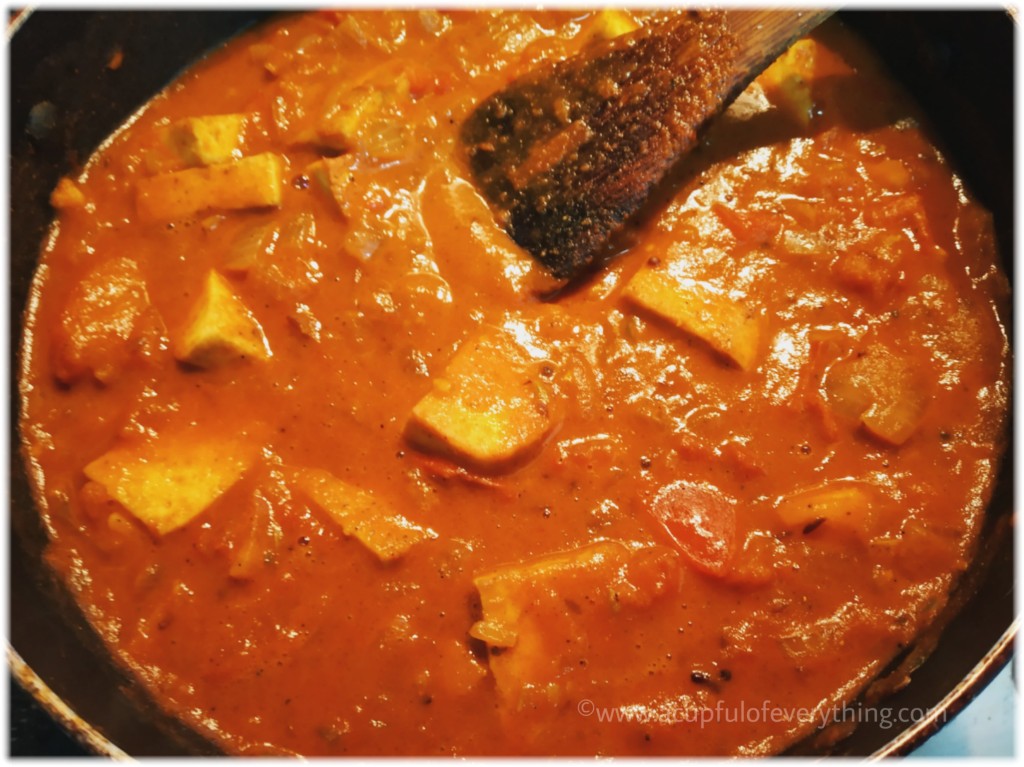
After a minute add the chopped tomatoes. Saute till the tomatoes are mushy and the water in the tomatoes starts evaporating and they start thickening and become gravy like.
Once the tomatoes turn mushy, add 1 whole packet of Suhana Paneer Tikka Masala.
**If you do not have Suhana Masala, add yoghurt/ cashew paste/ milk/fresh cream in this recipe, along with 1 tsp chopped garlic. Also add 1/2 tsp red chilli powder & 1 tsp garam masala as well. (For the cashew paste, just soak 10-12 cashews in water for 1 hour, drain water & grind cashews to a paste in the grinder)**
Add salt as per taste.
Add the tofu cubes that you had kept separately and mix them into the gravy.
Let the gravy simmer on low flame for a bit and once the gravy is thick enough and not runny, switch off the gas.
Let the gravy sit for atleast 15 min before serving as the tofu cubes will absorb all the flavour.
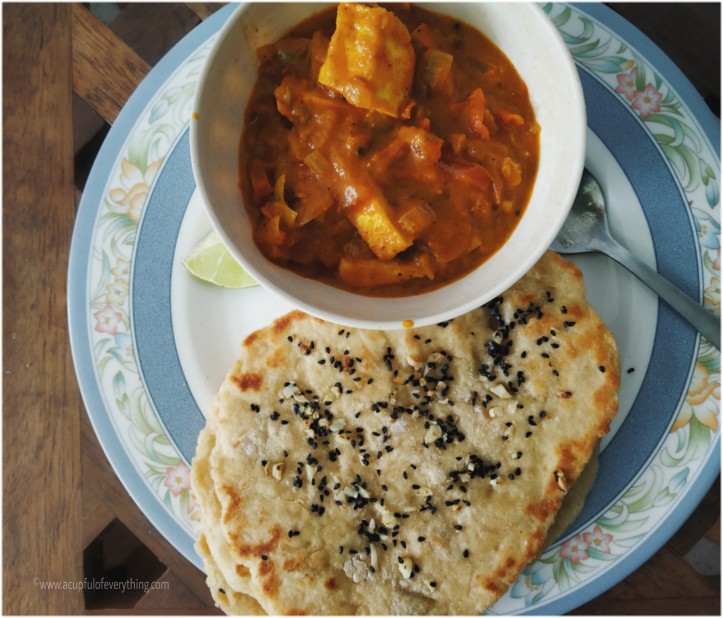
That’s it! Your Vegan Paneer Tikka, resturant style is ready. Garnish and serve with rotis, naan or phulkas.
I served it with garlic naan and it tasted amazing .
RECIPE FOR GARLIC NAAN
This Garlic Naan is mouthwatering and tastes amazing. Also, this is a healthier version of the naan where I have substituted half part of the flour with whole wheat flour. So don’t feel guilty about eating this naan!
Ingredients:
1 and 1/2 cup whole wheat flour
1 and 1’2 cup plain white flour
1 tsp sugar
1 & 1/2 tsps salt or according to taste
1 cup water
2 tbsp oil
1 packet of dry active yeast.
3 cloves minced garlic
2-3 tsps kalonji (nigella) seeds (optional)
Procedure:
In a bowl, combine the yeast, sugar, and water and let sit until very foamy. Warm water works best for activating yeast. The water should not be hot or it will kill the yeast. If you are not sure about the temperature, just add normal room tempabout 10 minutes. Meanwhile,in a large bowl add the both the types of flour & whisk them together. Create a well in the center.
After the yeast has activated & become frothy, add it to the well inside the flour, add oil as well and mix. After you have mixed it a bit, add salt. ( Never add salt directly to yeast as it will kill the yeast and not let it activate.)
Knead the mixture till it forms a dough. Dough should be pliable and it can get a bit stretchy.
Knead until the dough is formed, then turn out onto a lightly-floured surface and knead until smooth, about 3-4 minutes.
Transfer the dough to a large, lightly oiled bowl and cover loosely with a damp kitchen towel. Let rise at room temperature until doubled in size, about 1 hour.
After 1 hour, knead the dough briefly and shape the dough into dough balls.
This recipe will make approximately 11-12 dough balls depending on what size you make them into.
Heat a large, heavy bottomed skillet over medium heat. Roll each dough ball out until it is about 1/4 inch thick.
On one side, add sprinkle the minced garlic and kalonji seeds and roll over that side again so that they stick to the naan while cooking.
Place the naan carefully onto the hot skillet with the other side (which doesn’t have the garlic & seeds) down on the pan.
Cook until large bubbles form on the surface, about 2 minutes. Flip the dough and cook the other side until golden, about 1-2 more minutes.
Sprinkle oil as and when needed, while cooking the naan,
Stack the cooked naan on a plate and cover with a towel to keep warm as you cook the remaining pieces.
Naan in the making 🙂
That’s it your naan is ready. You can use butter in place of oil while making the naan.
You can garnish with coriander/cilantro as well. I didn’t because I did not have them in my kitchen.
Serve with your favourite sabzi or gravy. (Goes best with the Tikka Recipe above :D)
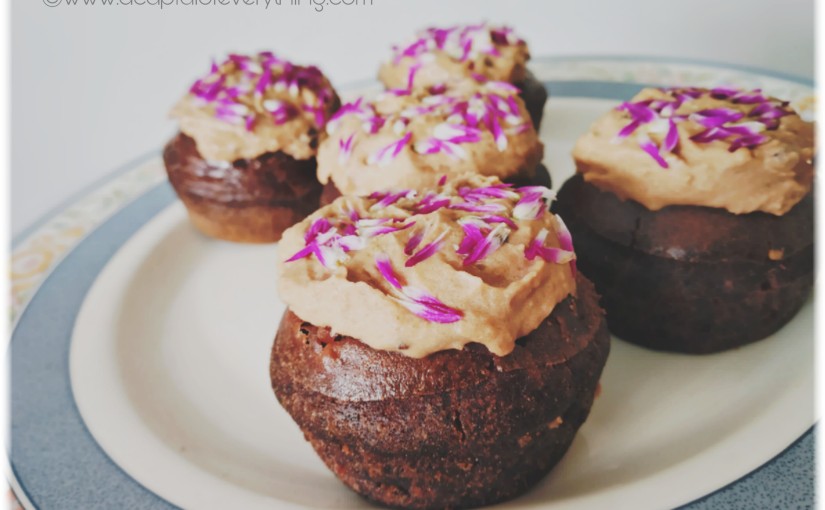
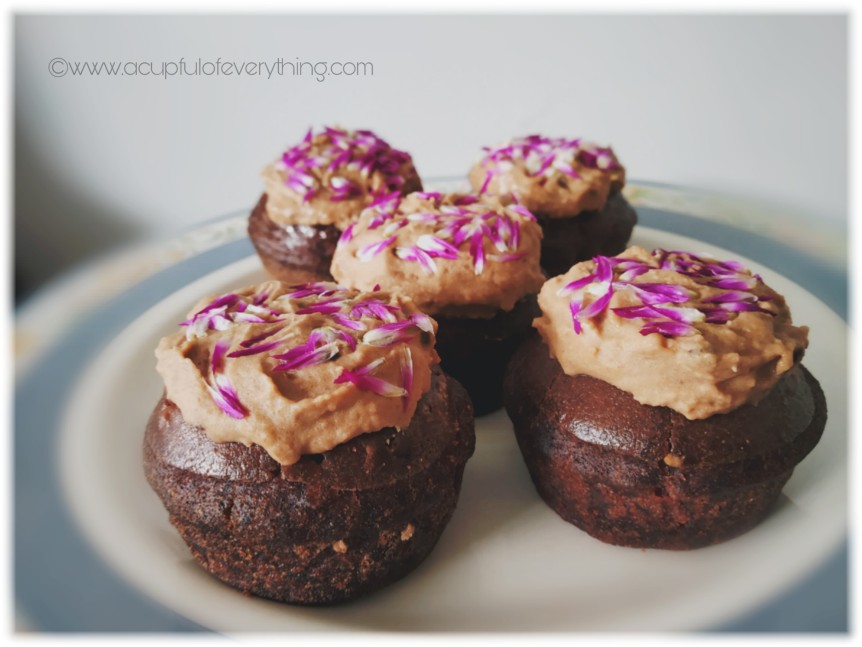
This Edible Flower Chocolate Cupcake recipe is all you need for brightening up your day!
It has chocolate, chocolate chips, edible flowers and all the yumminess you can ever imagine!
They do not contain eggs & you don’t need a piping bag to frost these cupcakes!
Sounds simple right?
When I first heard of edible flowers being used for baking, I was amazed.
It’s quite a norm to use edible flowers these days and why not? Flowers do make anything prettier, don’t they?
There’s just something about flowers that spells beauty.
So yeah, that’s why I decided to add edible flowers and bake these cupcakes.
My husband is quite fond of gardening, so used homegrown edible flowers for this one. It’s a flower called globe amaranth. I used the petals of this flower. You can use any edible flower you like. Even edible rose petals would be awesome!
Me and my husband are all for being ‘healthy’ and like the low sugar cupcakes better. Hence, I have used less sugar in this recipe. You can tweak it like I have mentioned below, as per your taste.
So sharing with all of you this very very simple and yummy recipe which I had originally made for Valentine’s Day.
Show yourself and your near and dear ones some love!
Ingredients
1. Corn Flour 2 cups
2 White flour (Maida) 2 cups
3. Sugar- 6-7 tbsps or as per taste. (I used around 4-5 tbsps sugar for low sugar cupcakes)
4. Cocoa powder 2 tbsps
5. Vanilla extract 1-2 tbsps
6. Coconut milk (or any other milk of your choice) 1 cup
7. 1- 2 tbsps olive oil
8. Baking soda 1-2 tbsps
Frosting:
1. 4 tbsps butter (vegan or normal butter)
2. 1 cup sugar.
3. 1 tbsp cocoa powder
4. 1 tbsp vanilla extract
5. Edible flowers and/or chocolate chips. (Optional). I used the petals of edible flower- globe amaranth for decoration since they have a neutral flavour and look pretty too!
Procedure:
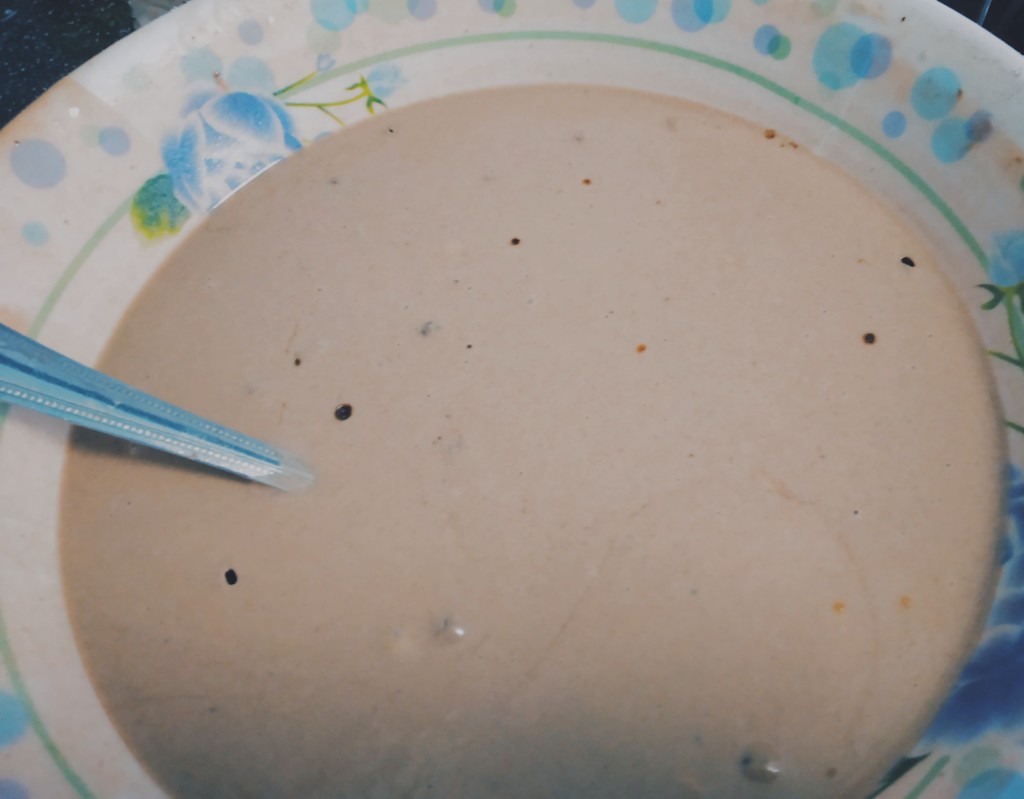
1. Mix all in all the ingredients except baking soda. First mix the dry ingredients and then add the milk and oil. You can add water if required.
2. Preheat your oven to 180°C While it preheats you can add baking soda to the mix. Stir in one direction. Don’t stir too much. Let batter sit till preheating is done.
Batter
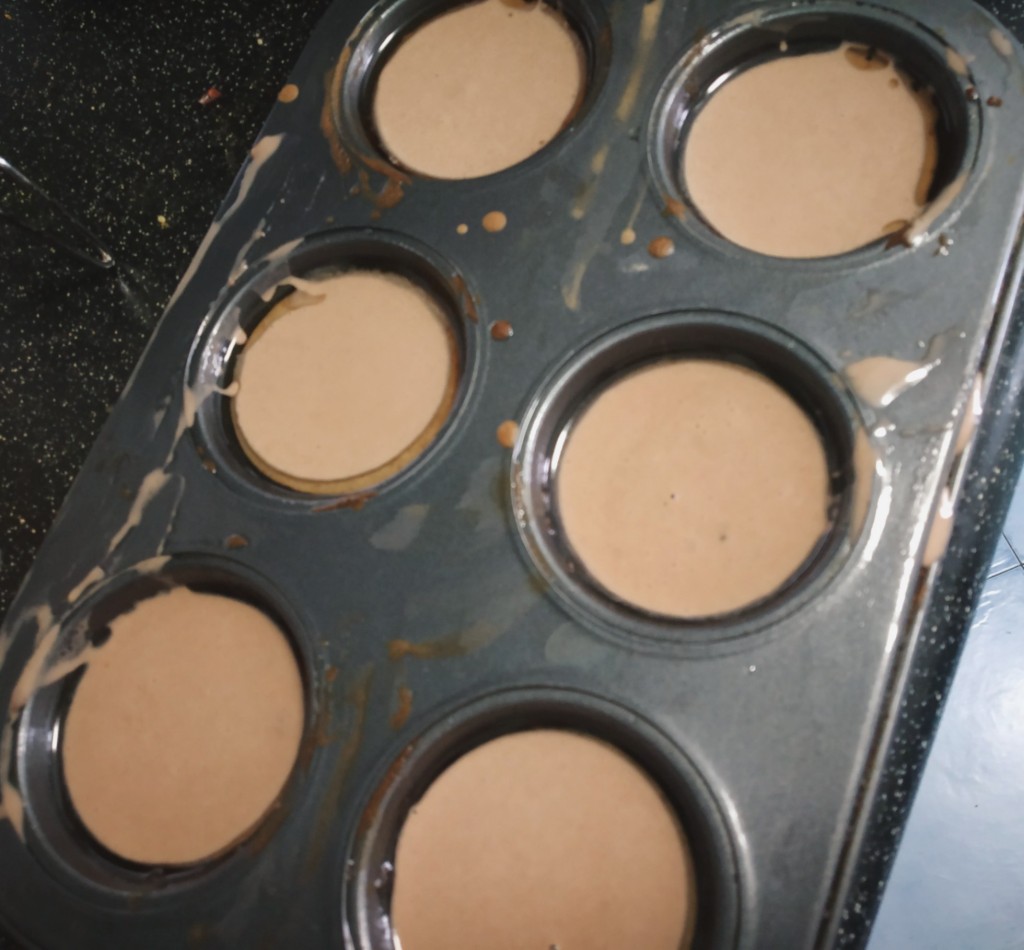
3. After your oven has preheated, pour your batter inside the moulds of your muffin pan. Do not fill batter completely in the moulds or it will overflow. Batter should fill around 3/4th of your muffin pan moulds.
4. Bake each batch of cupcakes for 15 min at 180°C
5. After they are done, remove the pan and then slowly remove your cupcakes from the pan.
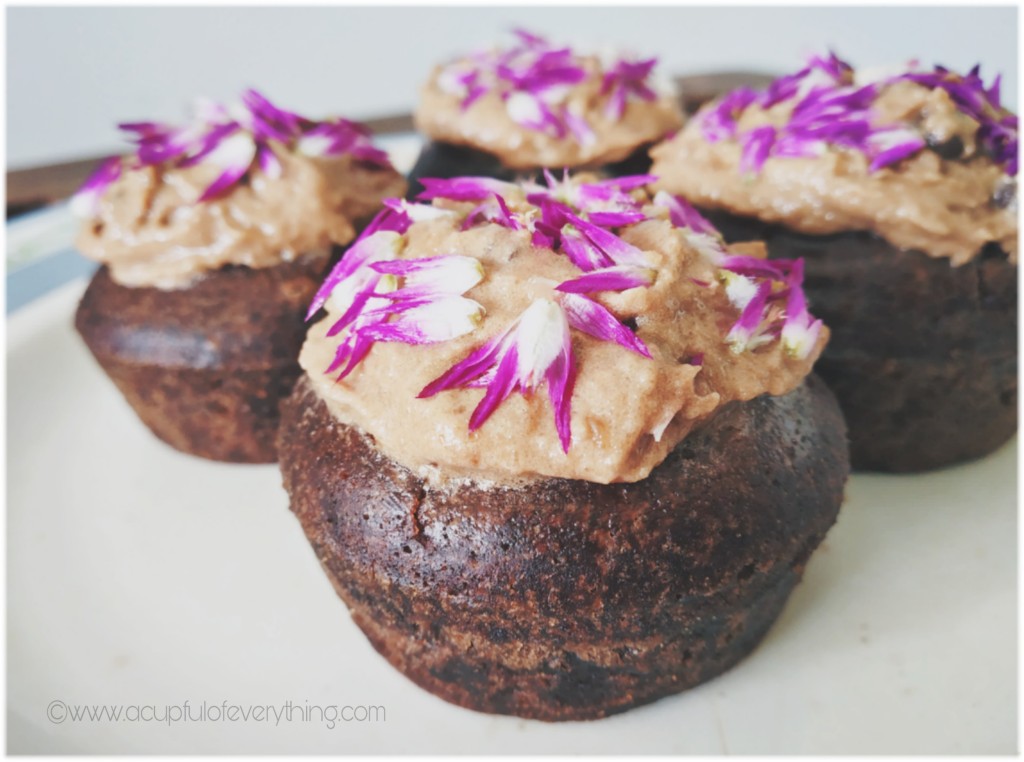
That’s it! Now you need to decorate your muffins.
In order to decorate, you must allow your baked chocolate cupcakes to cool down first.
Till then you can make the frosting.
For frosting-
1. Let the butter soften at room temperature. Do not microwave it at all.
2. Add the sugar and stir. Keep adding powdered sugar till it starts forming a cream and starts stiffening.
3. Add in the cocoa powder & vanilla extract.
4. Add a few chocolate chips
5. Once cupcakes have cooled, frost them using a spoon. Just spread the frosting on top with a spoon. You do not need a piping bag, although you can use one if you wish.
6. Sprinkle edible flower petals on top or add some more chocolate chips for decoration and skip sprinkling the edible flowers altogether.
That’s it. Your pretty cupcakes are ready to bite into!
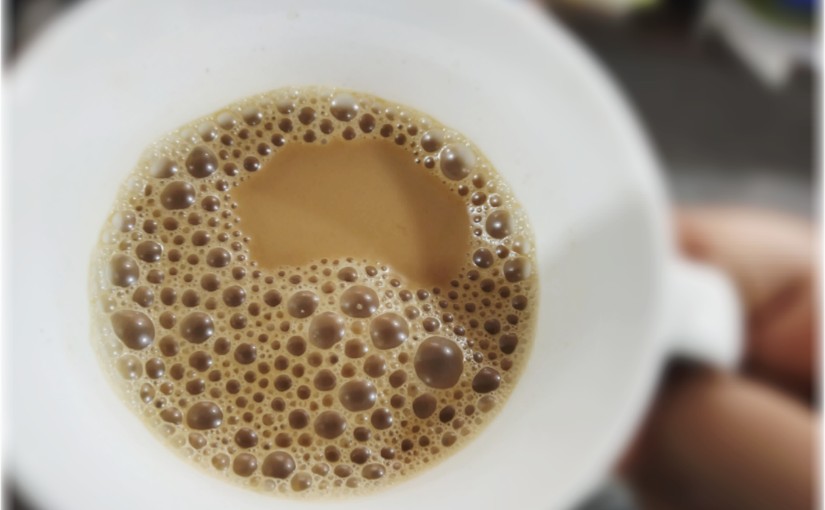
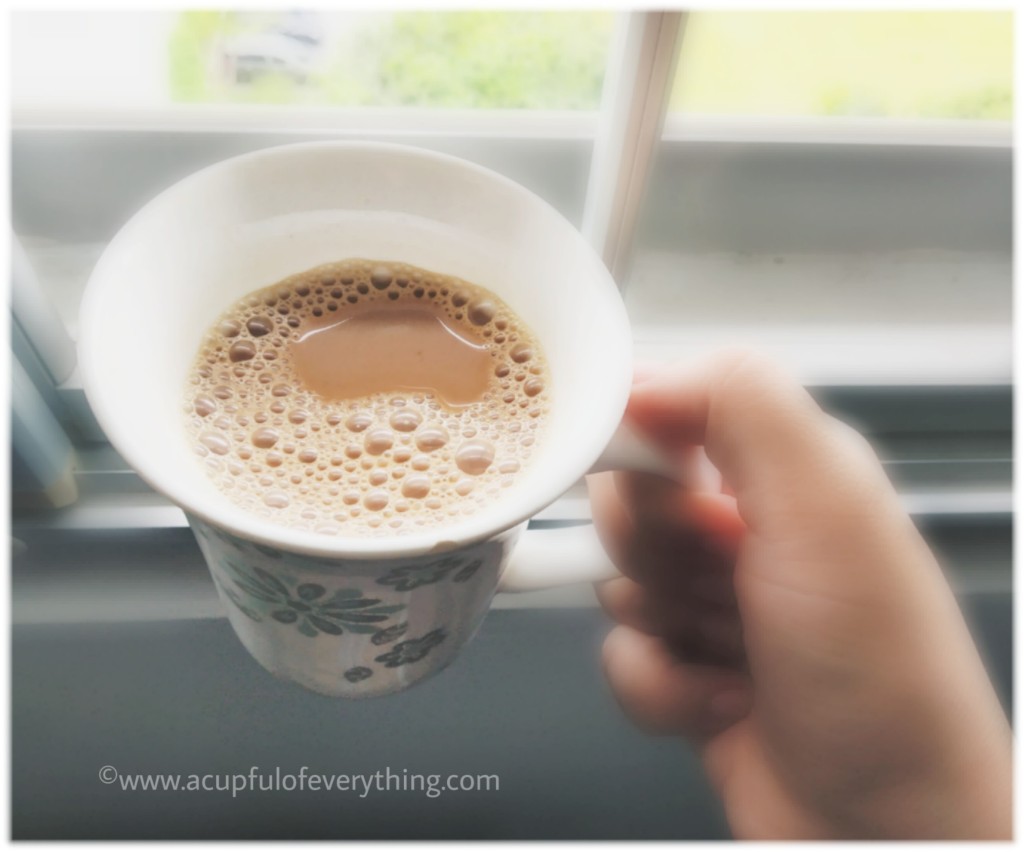
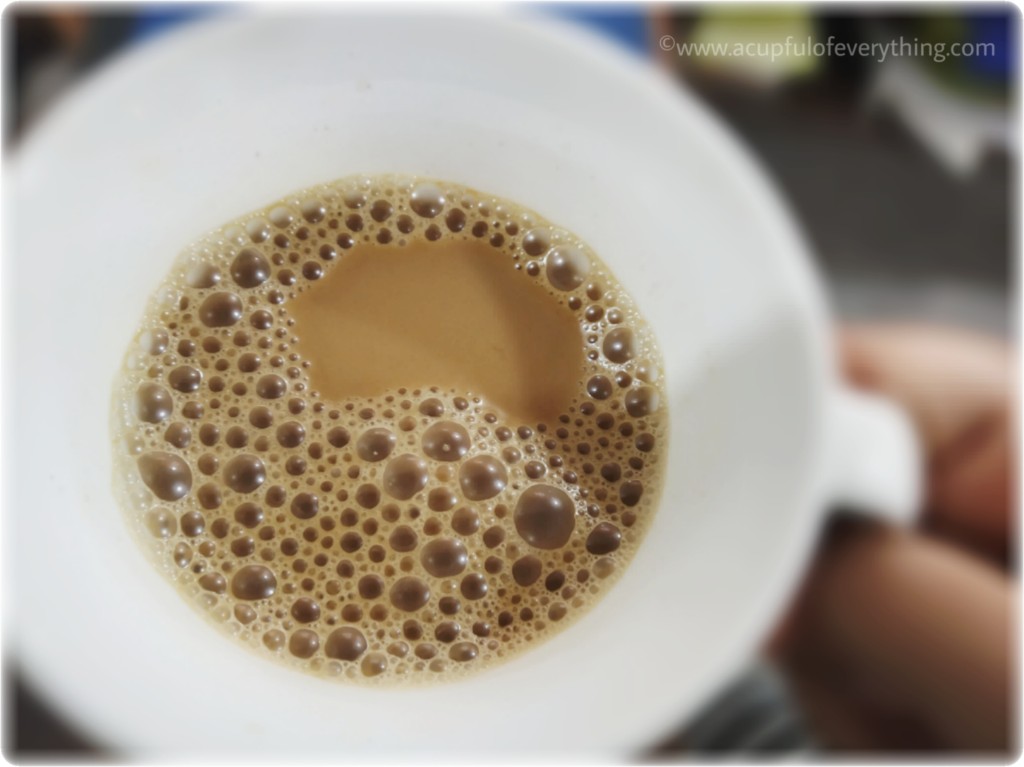
Hi everyone! If you have read my last post on Why I quit dairy in my diet, you know how much I love my Chai and Coffee and struggled to find an alternative to it once I went dairy-free.
Today I want to share with you a very simple recipe which is my go-to recipe whenever I make coffee. (Which would be every day, hah!)
Making coffee without milk (If you like black coffee,that’s another preference altogether) but if you love milk in your cappucinos or latte or your daily cup of coffee, I would strongly suggest you try my coconut milk coffee recipe.
Not only is it delicious to drink, but it’s also quite addictive and will keep you wanting for more!
So if you want to go dairy-free but are looking for an alternative to replace milk or you just want to experiment with your beverage and try something new, go make this recipe!
Also, if you are on a keto diet and want to do a fat-first coffee in the morning, this recipe is for you as well!
Coconut milk has good fat, which is good for your body and keeps you going throughout the day. Even then I would suggest moderate use, not excessive use of it.
Ingredients.
Coconut Milk (Full fat or reduced fat. I use Ayam Brand Trim Coconut milk-45% reduced fat. It’s the best available brand in Singapore. Any full fat brand should work as well. Just use in moderation. )
Instant Coffee of your choice. (Nescafe, Bru or any other brand you love)
Boiled water
Sugar to taste
Coffee Ingredients
Procedure.
Boil water.
In your coffee cup, add sugar as per your taste and coffee.
Add only 1/4th amount of water in the cup.
Now add the coconut milk. Keep stirring as you add. You can stop adding the coconut milk when you see the colour of the coffee change and become milky. Add to desired milkiness. I prefer it not too milky, just moderate. You can experiment and see how the taste varies
Now pour in the remaining boiled water in your cup as per the quantity you usually like.
Coffee Procedure
Enjoy!!
That’s it, your coconut milk coffee is ready!!
Deliciously creamy and so addictive!!
Hope you liked my recipe and if you do try it, let me know.
Food is something which is a very personal thing to each and everyone. Everyone is entitled to have their own opinions on food choices based on their culture and background.
However, with the rising awareness around food and food habits, one can’t deny the benefits of eating right and eating healthy and the effect of certain food groups on our body.
I was born in a vegetarian family in India, and have been a vegetarian almost my entire life, barring a few times in my childhood where I did try to eat meat. Whether you eat meat or not isn’t the topic of this post, since any discussion about it, requires an in-detail analysis, which I shall save for another time.
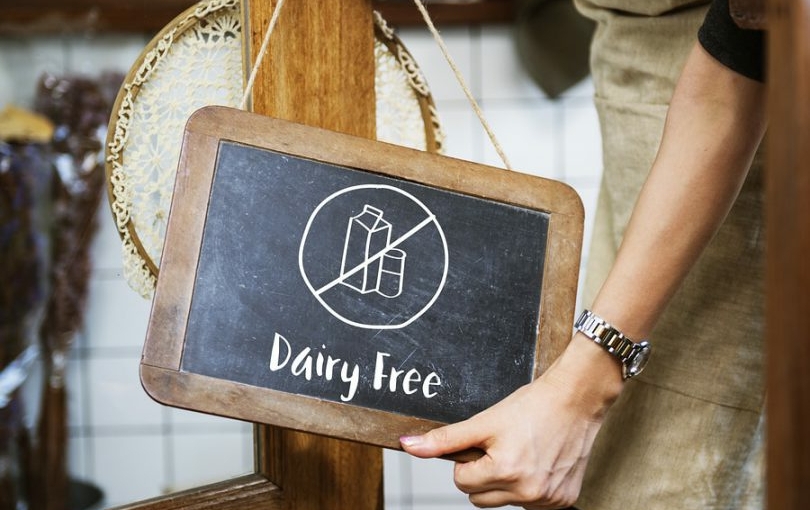
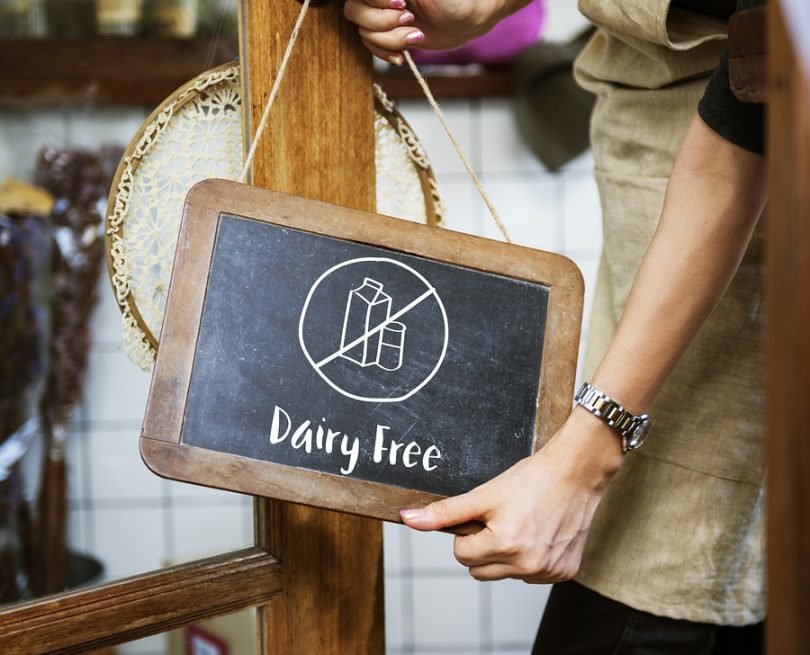
In this blog post, I shall be speaking of why I cut down dairy and dairy products (and essentially turned a vegan). Irrespective of whether you eat meat or not, this topic about dairy is a must read.
Today I will share with you my journey on why I quit consuming dairy and dairy products.
Since last two years, I was having health issues. Stomach bloating, digestion issues, etc. I had never really thought about the correlation between dairy and health issues. However, as the symptoms I faced increased, I realised it was time to make some lifestyle changes.
Soon, I started noticing that post consuming any dairy product, especially milk, my symptoms increased. That’s when I realised I had lactose intolerance.
Did you know, that 70% of human adults suffer from mild lactose intolerance? The human body, doesn’t really need milk after the baby grows up.
If you don’t believe me, think about this- The majority of humans naturally stop producing significant amounts of lactase — the enzyme needed to properly metabolize lactose, the sugar in milk — sometime between the ages of two and five.
We are mammmals and for most mammals, the normal condition is to stop producing the enzymes needed to properly digest and metabolize milk after they have been weaned. That’s why you will see the young ones of mammals like cats, dogs, etc need milk only for a certain period before they wean off.
Our bodies just weren’t made to digest milk on a regular basis. Humans are the only species who drink the milk of another species well into adulthood.
Lactose intolerance can cause stomach pain and bloating, diarrhoea, muscle and joint pain, cramps, at times constipation, headaches, acne, rash and eczema. The symptoms vary from person to person and I was experiencing a few of these.
Thus, the more I researched on the topic, the more I realized that dairy is not benefical for me and thus, the process of eliminating dairy from my diet began.
It was a tough but much needed decision.
If you too are facing some of the above mentioned issues, it’s time to try and eliminate dairy from my diet.
Now, like most of us, dairy was an important part of my life too. Especially when it came to having my Chai. Through all my college days, my crazy job changes and hectic work schedules, some where tea and coffee became a much needed part of my life. It was hard to imagine my life without my Chai with milk or Coffee with milk.
So, I did a lot of research and experimented with recipes and came up with my own substitution for milk in my daily chai and coffee cups. Also, I cut down and limited my intake of these two most loved beverages. (My husband would disagree though. He still considers me a big time chai addict. Which I cannot deny 😀 )
Once I replaced the milk part, I was ready to cut out dairy from my diet. I was never really a big fan of too much cheese, nor did I like butter or ghee in my diet. Replacing milk was my single-most and biggest challenge.
I decided to observe whether I was feeling any different after eliminating dairy from my diet.
I noticed the following changes in 3-4 days of no dairy consumption-
No more stomach bloat
Improved digestion
No sluggishness. Felt fresh and more active throughout the day
No more leg cramps (which I never thought I was having due to dairy. Leg cramps reduced by 90%)
Mental alertness level increased.
Felt light from within.
Made my skin clearer and better.
Overall, cutting dairy out completely from my diet, boosted my confidence, helped solve my digestion issues.
If you are someone who has been facing the issues I did, do try to cut down your dairy intake and observe if you feel a difference. Of course, do take advice from your doctor or nutritionist if you aren’t sure.
You can replace your normal milk in beverages with oat milk, coconut milk and soy milk. If feel coconut milk works best with coffee and soy milk and coconut milk both go well with Chai or regular English Tea.
You can opt for no- dairy cheese instead of the normal one. Lots of options available to replace your dairy cravings. You can do your own research and see what’s available in your locality.
If you are worried about losing your calcium intake, I understan. You can always replace the source of your calcium. Did you know seasame seeds, kale. amaranth, etc have high levels of calcium?
1 glass of milk will give you 250 mg of calcium whereas just 3 tablespoons of seasame seeds integrated into your food will give you 265 mg of calcium.
There are tonnes of articles out there, where you can find lots of nom-dairy calcium sources. So worry not!
Also, it cannot be ignored that the dairy industry is cruel to animals as well. Just for that one glass of milk, a cow gets torturted. A glass of milk that you do not need anyway. A glass of milk which is probably adulterated with chemicals and contains harmful hormones injected in the cows body to make her lactate. All of this is not good for your body or the cow’s.
Thus, I would encourage all of you who read this to try and elimate dairy.
Remember, dairy is not really a necessity for good health. I encourage you to go dairy-free and see what it happens.
I’d also like to hear from all of you …
Do you agree or disagree that dairy is bad for you?
Have you faced any issues while consuming dairy?
What changes – for better or worse, have you experienced if you’ve tried eliminating dairy?
Would you like to go dairy-free for a month just as an experiment and see what it does to your body? I strongly encourage you to do that. However, no where am I suggesting that you stop consuming other healthy food groups that have been a part of your diet.
Also, if you are like me and love your coffee- Do read this quick and simple No-Dairy Coffee.